Wednesday, February 17, 2010

PHP: References To Array Elements Are Risky

References to array elements can bite! And it is not only the case with referencing in foreach loop. It seems that creating a reference to an array element replaces that element itself with a reference. If you then copy such an array and change the elements inside copy you can overwrite original value!

All of the presented code was tested on Mac (PHP 5.2.11), Linux (PHP 5.2.6-1+lenny4) and Windows XP (PHP 5.3.0) using PHP cross platform testing lab on Mac based on VirtualBox.

Changing copy affects original array

Sounds impossible? I agree. I couldn't believe it myself. Nevertheless here is the proof:
Example 1
$a = array('one', 'two', 'three', 'four'); 
$a2 = &$a[2]; 
 
$b = $a; 
$b[1] = 'two again'; 
$b[2] = 'reference bites'; 
 
var_dump($a, $b);
The above example will output:
array(4) {
  [0]=>
  string(3) "one"
  [1]=>
  string(3) "two"
  [2]=>
  &string(15) "reference bites"
  [3]=>
  string(4) "four"
}
array(4) {
  [0]=>
  string(3) "one"
  [1]=>
  string(9) "two again"
  [2]=>
  &string(15) "reference bites"
  [3]=>
  string(4) "four"
}

Changing copy of a copy affects original array too

If you look at the dump carefully you will see that $a[2] and $b[2] are displayed as references here. That would mean the element has been replaced with a reference. And if you copy a reference you just get what? Same reference, right? So any copy of $a would contain that reference. Going forward any copy of a copy of $a would contain that same reference. Let's check it:
Example 2
$a = array('one', 'two', 'three', 'four'); 
$a2 = &$a[2]; 
 
$b = $a; 
$c = $b; 
$c[2] = 'references bites more'; 
$b[1] = 'two again'; 
$a[0] = 'one more'; 
var_dump($a, $b, $c);
The above example will output:
array(4) {
  [0]=>
  string(8) "one more"
  [1]=>
  string(3) "two"
  [2]=>
  &string(21) "references bites more"
  [3]=>
  string(4) "four"
}
array(4) {
  [0]=>
  string(3) "one"
  [1]=>
  string(9) "two again"
  [2]=>
  &string(21) "references bites more"
  [3]=>
  string(4) "four"
}
array(4) {
  [0]=>
  string(3) "one"
  [1]=>
  string(3) "two"
  [2]=>
  &string(21) "references bites more"
  [3]=>
  string(4) "four"
}

Tricky "foreach" with reference explained

As you can see, the only element affected is the one referenced. That can lead to serious potential problems. Working on a copy of an array with scalar elements seems to be not as safe as one may thought. However, that explains one of the biggest pitfalls of iterating arrays in PHP: foreach with reference. The following is rather common knowledge:
Example 3
$a = array('one', 'two', 'three', 'four'); 
foreach ($a as &$v) {} 
foreach ($a as $v) {} 
var_dump($a);
The above example will output:
array(4) {
  [0]=>
  string(3) "one"
  [1]=>
  string(3) "two"
  [2]=>
  string(5) "three"
  [3]=>
  &string(5) "three"
}
But what was the explanation for that, again? It is quite clear that $v keeps reference to $a[3] after the foreach loop is finished. So what values does $v (effectively $a[3]) get within the next foreach loop? Let's see:
Example 4
$a = array('one', 'two', 'three', 'four'); 
foreach ($a as &$v) {} 
foreach ($a as $v) { 
 var_dump($a[3]); 
}
The above example will output:
string(3) "one"
string(3) "two"
string(5) "three"
string(5) "three"
Well, it's quite obvious. Or is it? As the foreach manual page states: "unless the array is referenced, foreach operates on a copy of the specified array and not the array itself". I would assume that "array is referenced" means array elements are referenced like this: foreach ($a as &$v) {} Apparently that is not the case with the second loop and it should work on a copy. Let's have a look what exactly would happen if the second foreach loop really worked on a solid copy:
Example 5
$a = array('one', 'two', 'three', 'four'); 
$b = $a; 
foreach ($a as &$v) {} 
foreach ($b as $v) {} 
var_dump($a);
The above example will output:
array(4) {
  [0]=>
  string(3) "one"
  [1]=>
  string(3) "two"
  [2]=>
  string(5) "three"
  [3]=>
  &string(4) "four"
}
I imagine you did expect this result. Beware references to array elements and thanks for reading. I hope you found this article useful. Please don't think twice before you leave your comment.

Sunday, February 7, 2010

PHP: Cross Platform Testing Lab on Mac How To

Taking PHP development seriously, it is not very uncommon practice to do cross-platform tests of own code. With virtual machines it is dead easy to test your PHP code on three popular systems (Mac OS X, Linux and Windows) using only one physical machine. To make it even more pleasant all systems can share PHP code from one location hence there is no need to copy every time you want to test. And here comes the cream: you can get fully-blown eye-candy virtualizer for free.

VirtualBox is good and is free!

Yes, that is correct. VirtualBox is free and made by SUN. It is good piece of software, very reliable and easy to use. You can get VirtualBox for Windows, Mac or Linux.

VirtualBox performance on Mac Mini

I used VirtualBox to create Vrtual Cross-Platform PHP Lab on my Mac Mini run by Snow Leopard (10.6.2). My Mac was armed with 1.83GHz Intel Core 2 Duo CPU and 2BG of RAM. I have created one virtual machine for Windows XP SP2 and one for Debian 5.03 "lenny". Each virtual machine was limited to 256MB of memory and 2GB of hard drive space.

Running both virtual boxes with AMPs on them along with MAMP on the hosting Mac did not visibly affect overall host system responsiveness. I could have Chrome, Firefox, Aptana, Preview, iTunes, Skype and Activity Monitor running concurrently and smoothly. Only Spaces (9 desktops) were a bit more choppy than usual. Each of the virtual boxes was also responsive.

Both guest systems were visible and accessible over the local network. They could easily obtain IP addresses from DHCP server existing within the network. All the network communication was also reliable except for situations when one of the boxes (either real or virtual one) generated heavy traffic on the network interface. Downloading 100MB from Internet at 200kB/s was enough to cause connection disruption.

Set up Mac OS X host system

If you are PHP developer working on Mac, probably you already have half of the work done. Nevertheless assuming you are starting from scratch the following steps need to be accomplished:
  1. Download MAMP (Mac OS X AMP) and install it.
  2. Download VirtualBox for Mac and install it.
Both packages come with nice Macish installers and therefore the whole process is really straightforward.

Create WAMP virtual machine on your Mac

Now it's time to create your Windows virtual machine and set it up. I used Windows XP because it is relatively lightweight and fast compared to alternatives. VirtualBox is not fussy though and allows you to prepare virtual machine for many different operating systems including quite a few versions of Windows. Here is a step by step guide which tells you how to create a virtual machine, install Windows (XP) on it and configure WAMP to access PHP projects stored in the host filesystem:
Create new virtual machine for Windows.
Simply go to Machine -> New. Then just follow the guide, it takes about 2 minutes. There are no difficult questions and if you want to know more - the help is really good. I have created Virtual Machine called "virtual-winxp" with 256MB of RAM and 2GB of new virtual hard drive being dynamically expanding storage. The network adapter I have chosen was bridged adapter. The latter is important if you want to have access to LAN and Internet from your the guest OS and be able to access the guest OS from your Mac.
Install your preferred version of Windows.
My Win XP installation process was real time. When installer announced 30 minutes left - it was 30 indeed minutes. Network name of my Win XP was again "virtual-winxp".
Download WAMP and install it
Nothing I could think of to add here.
Install VirtualBox Guest Additions
Go to Devices -> CD/DVD Devices and choose VBoxGuestAdditions.iso. You can do so even when the guest OS is running. Virtual CD will appear in your drive and you will know what to do. VirtualBox Guest Additions are essential if you want to share your PHP code with the host OS.
Configure shared folder
That would allow you to share your PHP code with the host OS. Go to Devices -> Shared Folders... and click "Add shared folder" icon - the one with "+" sign. Then choose your projects folder from Mac, say /Applications/MAMP/htdocs/projects and name it, say "projects". Now that folder will be accessible from Windows as pseudo network drive \\vboxsrv\projects. It is probably a good idea to make it permanent if you don't want to repeat this step every time you start your guest OS.
Configure your WAMP to use projects folder
Let's assume you want to access your PHP projects through your WAMP as http://virtual-winxp/projects. Go to your Windows, click on the WAMP icon in system tray, choose Apache -> Alias directories -> Add an alias. When the command window appears, type in the alias name "projects".
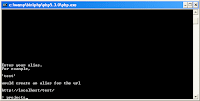
On the second screen enter the real directory name being "//vboxsrv/projects". Forward slashes are not a mistake, Apache for Windows likes it like that. Your WAMP should restart and when you go to http://localhost/projects you should see your Mac projects directory.
Make your WAMP visible for your Mac
If you prefer to test results of your PHP on your Mac (who wouldn't) rather than on the guest OS, it might be a good idea, to make your WAMP visible in the local network. All you need to do is click on your WAMP icon in system tray, choose "Put Online" and wait till the Apache restarts.

Create LAMP virtual machine on your Mac

Preparing Linux virtual box was even easier because there was no clicking involved! Ok, in fact I was installing Debian without GUI, so I needed to amend a couple of files manually. No rocket science though, just some config files.
Create new virtual machine for your Linux
Similar procedure as for virtual machine for Windows, only different name ("virtual-debian" in my case). Settings exactly the same: 256MB RAM, 2GB virtual HDD expanding storage and bridged network adapter. Please remember, that the bridged network adapter is important if you want to access LAN and Internet from your guest OS and also access the guest OS from your Mac.
Install your preferred distribution of Linux
I have chosen Debian because it has very good package management and I like it. The hostname I set for it was again "virtual-debian".
Install nano
As mentioned before, you might need to change a few config files. If you are not familiar with vim it is probably a good idea to install more friendly console editor. When logged in as root run:
#aptitude install nano
Install LAMP for Debian
Just follow the link, it's all in there.
Prepare for installing VirtualBox Guest Additions
These are installed as a kernel modules which are being compiled for you by the installer. That means that you need to install kernel headers beforehand. First of all find out what kernel you are running:
#uname -r
I got result like this:
2.6.26-2-amd64
Once you know the version it's time to install headers. Simply repeat the version at the end of linux-headers package:
#aptitude install linux-headers-2.6.26-2-amd64
The installer might ask you a few questions, for example about installing additional packages. It's safe to answer "yes" to all of them.
Install VirtualBox Guest Additions
Again, go to Devices -> CD/DVD Devices and choose VBoxGuestAdditions.iso. You can do so even when the guest OS is running. Virtual CD will become ready for you to mount and access it:
#mount /media/cdrom
Then you need to copy installer to your hard drive:
#cd /media/cdrom
#cp VBoxLinuxAdditions-amd64.run /~

and run it:
#cd
#./VBoxLinuxAdditions-amd64.run

Configure shared folder
Same as with Windows virtual box. That would allow you to share your PHP code with the host OS. Go to Devices -> Shared Folders... and click "Add shared folder" icon - the one with "+" sign. Then choose your projects folder from Mac, say /Applications/MAMP/htdocs/projects and name it, say "projects". Now that folder will be available to mount from your Linux (Debian) as... projects (read next point for explanation). It is probably a good idea to make it permanent if you don't want to repeat this step every time you start your guest OS.
Configure your Debian to mount shared folder on startup
Now everything is set up and ready we only need to mount projects folder from your Mac on your Linux virtual box. Assuming you want to access your projects folder as http://virtual-debian/projects and you don't want to mess around with Apache config too much (at least at this point) simple create the mount point and mount:
#cd /var/www/
#mkdir projects
#mount -t vboxsf projects projects

Now inside projects directory you should see contents of your Mac projects directory. To make this mount occur every time you start your Linux, you need to add a line to /etc/fstab config file. Open the file:
#nano /etc/fstab
and add the following line:
projects    /var/www/projects    vboxsf    ro    0    0
Save the file and you are sorted. From now on, whenever you boot Linux the folder will be mounted for you and ready to use. And don't worry about the mount error - it's because default Linux mount happens before the vboxadd service is loaded.

Setup Fixed IP Addresses for your Virtual Farm

My virtual boxes get IP addresses from DHCP server running within my network. Their IPs used to change every now and then and I must admit I found it quite annoying. To avoid that problem I have assigned IP addresses statically to both virtual boxes on my DHCP server. Now they still receive the whole information package (DNS, gateway and so on) but their IPs are same every time.

Access your virtual boxes by names

If you prefer to access your virtual boxes via their names (like virtual-winxp) rather then IPs you may want to add them to your /etc/hosts file on your Mac. It's dead easy and takes no time. Simply run your Terminal.app (it's in /Applications/Utilities directory) and switch to root:
$su -
here you enter your password, and then edit the /etc/hosts file:
#nano /etc/hosts
Here you need to add one line for each virtual box. First IP then the name you like, for example:
192.168.0.11    virtual-debian
192.168.0.12    virtual-winxp
Save it and job done.

Thanks for reading. I hope you found this guide useful, it worked for you and made you a bit happier. Please don't think twice before you leave your comment.

Wednesday, January 27, 2010

PHP: array_rand does not shuffle!

PHP function array_rand() does not shuffle results anymore and behaves like array_keys() in some circumstances.

Yes, that is correct. The function array_rand() gets random key (or keys) from given array. Funny thing is that it does not shuffle the keys anymore. So the following code:

<?php
$a 
= array (=> 'key 5''key after 5'=> 'key 3''a' => 'key a'=> 'key 1'=> 'key 0''key after 0',);
print_r($a);
print_r(array_rand($a5));
print_r(array_rand($acount($a));
print_r(array_keys($a);
?>

would produce that result:

Array
(
    [5] => key 5
    [6] => key after 5
    [3] => key 3
    [a] => key a
    [1] => key 1
    [0] => key 0
    [7] => key after 0
)
Array
(
    [0] => 3
    [1] => a
    [2] => 1
    [3] => 0
    [4] => 7
)
Array
(
    [0] => 5
    [1] => 6
    [2] => 3
    [3] => a
    [4] => 1
    [5] => 0
    [6] => 7
)
Array
(
    [0] => 5
    [1] => 6
    [2] => 3
    [3] => a
    [4] => 1
    [5] => 0
    [6] => 7
)

That means, that getting randomly array-size number of keys from the array array_rand($a, count($a)) give exactly same result as getting all the keys in order array_keys($a).

Friday, January 22, 2010

PHP: Array Pointer in Undefined State

Array pointer in PHP may become "undefined" and that is when you try to move it after the last of before the first element. But what is more surprising - copying an array remaining in that state... resets the pointer.

First let's create a messy array and see how it dumps:

$a = array (5 => 'key 5', 'key after 5', 3 => 'key 3', 'a' => 'key a', 1 => 'key 1', 0 => 'key 0', 'key after 0',);
var_dump($a);

The result (as expected):

array(7) {
  [5]=>
  string(5) "key 5"
  [6]=>
  string(11) "key after 5"
  [3]=>
  string(5) "key 3"
  ["a"]=>
  string(5) "key a"
  [1]=>
  string(5) "key 1"
  [0]=>
  string(5) "key 0"
  [7]=>
  string(11) "key after 0"
}

When Array Pointer Becomes Undefined

Let's try and go beyond the last element in the array:

// move the pointer to the last element
end($a);

// move the pointer one element further
next($a);

// ... and see where we are
var_dump(key($a), current($a));

// try to go back
prev($a);

// ... and see where we are
var_dump(key($a), current($a));

The above code will produce the following result:

NULL
bool(false)

NULL
bool(false)

Which simply means that the array pointer becomes "undefined" if moved after last element. In fact the pointer is not "after" the last element because you cannot move it back with

prev()
function. It simply remains in undefined state.

Copying Array Resets The Pointer

When you copy an array, the array pointer is copied as well and it points to the same element as in the original. But what happens when the pointer is undefined? Will the copy inherit that as well? Let's consider the code:

// copy the array
$b = $a;

// check state of the original
print ('original: key() and current()' . PHP_EOL);
var_dump(key($a), current($a));

// check state of the copy
print ('copy: key() and current()' . PHP_EOL);
var_dump(key($b), current($b));

And the result:

original: key() and current()
int(5)
string(5) "key 5"

copy: key() and current()
NULL
bool(false)

Just as anticipated, the copy has its pointer in undefined state. But what happened to the original? Apparently copying the array worked like

reset()
and moved the pointer to the first element! Needless to say, copying the array preserves the pointer's value if it's defined:

// move the pointer to the last element
end($a);

// move the pointer to one element before last
prev($a);

// see where we are
print ('key() and current()' . PHP_EOL);
var_dump(key($a), current($a));

// copy the array
$b = $a;

// check state of the original
print ('original: key() and current()' . PHP_EOL);
var_dump(key($a), current($a));

// check state of the copy
print ('copy: key() and current()' . PHP_EOL);
var_dump(key($b), current($b));

And the output:

key() and current()
int(0)
string(5) "key 0"

original: key() and current()
int(0)
string(5) "key 0"

copy: key() and current()
int(0)
string(5) "key 0"

Moving Array Pointer Before First Element

All the above applies to the situation when you move the pointer "before" the first element. But don't take my word for it - try it out.

Friday, January 15, 2010

PHP5: Bitwise Left Shift Goes in Cycle

Going through ZEND PHP Certification Study Guide I came across a bit confusing example. It says that bitwise left shift by 32 positions on integer value of 1 performed on 32-bit machine would give 0 as a result.


Reading through the guide I usually write small snippets of code to check things myself and remember them better. So I did this time. To my big surprise, the result was different from what I had read. Here is the code:

<?php
$x = 1;
echo $x << 32;
// outputs 1

I wanted to find out what was going on, so I tried:

<?php
$x = 1;
print ('PHP_INT_SIZE: ' . PHP_INT_SIZE . "\n");
$maxBits = PHP_INT_SIZE * 8;

$format = '%0' . $maxBits . "b\n";

for ($i = $maxBits - 1; $i <= $maxBits + 1; $i++ ) {
printf('x << ' . $i . ': ' . $format, $x << $i);
}

for ($i = $maxBits * 2 - 1; $i <= $maxBits * 2 + 1; $i++ ) {
printf('x << ' . $i . ': ' . $format, $x << $i);
}

And here is the result I got:

PHP_INT_SIZE: 4
x << 31: 10000000000000000000000000000000
x << 32: 00000000000000000000000000000001
x << 33: 00000000000000000000000000000010
x << 63: 10000000000000000000000000000000
x << 64: 00000000000000000000000000000001
x << 65: 00000000000000000000000000000010

That means that bitwise shifting left goes in cycle modulo architecture-defined-number-of-bits. On 32-bit machine shift left by 32 bits gives same result as no shift at all (32 % 32 = 0). Shift by 33 is same as shift by 1 (33 % 32 = 1).
But is it really true? How about shifting different value than 1? I tried to shift 2 and here is the result:

PHP_INT_SIZE: 4
x << 31: 00000000000000000000000000000000
x << 32: 00000000000000000000000000000010
x << 33: 00000000000000000000000000000100
x << 63: 00000000000000000000000000000000
x << 64: 00000000000000000000000000000010
x << 65: 00000000000000000000000000000100

I checked the results on Mac (PHP 5.2.6), Windows (PHP 5.3) and Linux (PHP 5.2.12) and they were identical. It looks like new language feature which wasn't present while the ZEND PHP Certification Study Guide has been created. Although the Bitwise Operators manual page warns: "Don't left shift in case it results to number longer than 32 bits."
It's for another discussion whether to use it or not. Anyway, I guess it's good to know.

Tuesday, October 20, 2009

Xcode 3.2.1 and Jailbroken iPhone 3.1.2 is Build & Go!

XCode 3.2.1 on Snow Leopard plays nicely with jailbroken iPhone OS 3.1.2. You can do Buid & Go and even debug directly on the device. The procedure described for XCode 3.2 and iPhone OS 3.1 is exactly the same. However, I have been asked a couple of times to put it all together and make a step-by-step guide and this seem to be a good occasion.

First things first: a jailbroken iPhone 3.1.2

If your iPhone is already jailbroken, you should know what to do. I used Pwnage Tool 3.1.4 and the good news is that this time there is no need to enter DFU mode!

If your iPhone is still jailed, it would be probably a good idea to read through the Pwnage Tool 3.1.4 release news and maybe have a look at the jailbreaking step-by-step guide which works for me every time.

Once your iPhone is jailbroken, open Cydia go to the "Manage" tab, select "Sources" and add http://iphone.org.hk/apt/. Then install "Installd Patch" (see image). This is crucial for installing your own application on your iPhone using XCode.

Obtain a self-signing identity

Jailbroken or not iPhone needs software to be signed. If this is your first time, you need to create your own signing certificate. The whole process is described in detail in the original Apple document titled "Obtaining Signing Identity".

Make sure you create the certificate in the default "login" keychain. For avoidance of doubt you would probably like to call your identity "iPhone Developer". This EXACT name is being used in most of the online resources I have seen so far.

Once you have the certificate, switch to XCode and go to Project -> Edit Project Settings, scroll to Code Signing / Code Signing Identity / Any iPhone OS Device and change the value to your freshly created identity name, probably "iPhone Developer" (see image). This step needs to be repeated for each of the existing projects. All new projects should get the value automatically.

Make XCode 3.2.1 compile for your iPhone 3.1.2

Self-signing certificate is good enough for you, it should be so for XCode. Let's tell him. In the file:
/Developer/Platforms/iPhoneOS.platform/Info.plist
find line 46 and replace "XCiPhoneOSCodeSignContext" with "XCCodeSignContext" (see image). Repeat the operation for line 79 and save the file.

If you want to stop here because you don't need debugging, just restart XCode and you should be able to use Build & Go to compile and install applications on your iPhone directly from XCode.

Make XCode 3.2.1 debug on your iPhone 3.1.2

There is some small work to be done if you want to make your XCode 3.2.1 debug on your iPhone 3.1.2 for you. First of all you need to have ldid and ldid2. ldid is a replacement for codesign, which adds entitlements necessary for debugging. We have lost the feature in previous part and now it is time to get around. ldid2 is a shell script which makes use of ldid.

After you have downloaded the archive, unpack the files and put them into /usr/local/bin directory. Then make sure they are both executable.

The last step would be to tell XCode it needs to use ldid2 instead of codesign. In the file: /Developer/Platforms/iPhoneOS.platform/Developer/Library/Xcode/Plug-ins/iPhoneOS Build System Support.xcplugin/Contents/Resources/iPhoneCodeSign.xcspec find line 12 and replace "/usr/bin/codesign" with "/usr/local/bin/ldid2" (see image).

Now restart XCode and you should be able to do Build & Go and debug directly on your iPhone.

Update (26/10/2009)
Well, almost. Just one tiny thing remaining. For every project you want to debug, you need to add -gta flag to "Other Code Signing Flags" in the project settings.

I hope you found this guide useful, it worked for you and made you a bit happier. Please don't think twice before you leave your comment.

Thanks for reading,
Jacek

Acknowledgements

This guide could not be possible if not for two great articles:

Friday, October 2, 2009

XCode 3.2 Build & Go with jailbroken iPhone 3.1

XCode 3.2 on Snow Leopard works fine with jailbroken iPhone 3.1! And even better: Build & Go works as well as debugging on the device. I tried a couple of different ways to get there, went through a few blogs and here is the conclusion.

Update (21/10/2009):
XCode 3.2.1 works fine with iPhone 3.1.2 as well

Xcode 3.2 and iPhone 3.1

  1. First of all you need a jailbroken iPhone. The procedure for 3.1 is same as for 3.0, only the Pwnage Tool is in new version.
  2. Follow first three steps of the "Developing for a jailbroken iPhone" guide and disregard completely anything after "Add the special 3.0 sauce:". We are not going to patch the binary this time. Make sure you have installed "Installd Patch" on your iPhone. It is critical.
  3. Follow the section "I want to compile" from the "Compiling iPhoneOS (3.1) apps with Xcode 3.2 without Provisioning Profile" Guide. At this stage you should be able to compile application and install it on your iPhone. Keep in mind that you have Installd Patch installed. This is something the author was not aware of.
  4. If you want to debug on your device, all you need to do is to follow only first four steps from the section "I want to install and debug too". This is because you can already install and following the first four steps allows you do debug.
That's pretty much it. Now you should be able to use Build & Run, Install and Debug your app directly on your jailbroken iPhone 3.1 using XCode 3.2. Enjoy!

Leftovers from Xcode 3.1.3 and iPhone 3.0

If you made Xcode 3.1.3 work with iPhone 3.0 before following the "Developing for a jailbroken iPhone" guide you may have added "New Run Script Build Phase" for your projects. As it is no longer necessary, you may want to do some housekeeping and get rid of the scripts. Here is how to do it:

In order to remove the scripts you need to open your project, then in the left hand pane called "Groups & Files" (the one showing tree view of your project) find "Targets". Expand if necessary and there you should see your app name. Expand again and there you should get a few entries including "Run Script" - which you were looking for. It is described in the documentation included in the XCode (/Developer/Platforms/iPhoneOS.platform/Developer/Documentation/DocSets/com.apple.adc.documentation.AppleiPhone3_1.iPhoneLibrary.docset/Contents/Resources/Documents/documentation/DeveloperTools/Conceptual/XcodeBuildSystem/200-Build_Phases/bs_build_phases.html) and illustrated on the left.